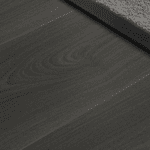
The QA LVT Transition is the perfect way to conceal joins between 2 different floors and also expansion breaks in floating floors across doorways and in large floor areas. Putting a piece of the actual LVT being fitted into the profile channel means that only a neat tramline is visible which gives a much smarter finish than a coloured profile.
How to install with glue down LVT Flooring
- Ensure the flooring where the Transition is to be installed is clean, dry and free of dust.
- Measure and cut the Transition to the required length. Remove any burr from the cut edge.
- Cut strips of the LVT to a width of 23mm to fit into the Transition channel. The top rails of the channel give a cutting tolerance of +/- 2mm as they conceal the edges of the LVT strip.
- Slide the LVT strip into the Transition channel from the end of the length being installed. After the profile has been installed in position and the ends butted up to the skirting or door architrave, the strip will not be able to slide out of the channel.
- Peel the release paper fully from both self adhesive strips on the underside of the Transition and press the profile down firmly to the floor both sides of the joint being concealed, ensuring a secure bond along the whole length of the profile.
How to install with SPC Click Flooring
Note: The LVT Transition is designed to fit LVT 2-2.5mm thick so if you are installing a Click floor you will need to use a LVT of matching colour to fit into the Transition.
- Ensure the flooring where the Transition is to be installed is clean, dry and free of dust.
- Measure and cut the Transition to the required length. Remove any burr from the cut edge.
- Cut strips of the LVT to a width of 23mm to fit into the Transition channel. The top rails of the channel give a cutting tolerance of +/- 2mm as they conceal the edges of the LVT strip.
- Slide the LVT strip into the Transition channel from the end of the length being installed. After the profile has been installed in position and the ends butted up to the skirting or door architrave, the strip will not be able to slide out of the channel.
- Peel the release paper fully from one of the two self adhesive strips on the underside of the Transition. Cut 10mm sections in the backing paper of the other strip approximately every 100mm and peel off the release paper in these sections only to expose small spots of the self adhesive strip. This is very important to allow the natural movement of the floor in the expansion gap under the Transition.
- Press the profile down firmly to the floor both sides of the joint being concealed, ensuring a secure bond along the whole length of the profile.

